レイアウトを表示
View layout
VStackとHStackを使用してスタックを作成する方法
How to create stacks using VStack and HStack
var body: some View {
        VStack {
            VStack {
                Text("SwiftUI")
                Text("rocks")
            }
            HStack {
                Text("SwiftUI")
                Text("rocks")
            }
        }
    }
配置と間隔を使用してスタックレイアウトをカスタマイズする方法
How to customize stack layouts with alignment and spacing

var body: some View {
        VStack {
            VStack(spacing: 50) {
                Text("SwiftUI")
                Text("rocks")
            }
            VStack {
                Text("SwiftUI")
                Divider()
                Text("rocks")
            }
            VStack(alignment: .leading) {
                Text("SwiftUI")
                Text("rocks")
            }
            VStack(alignment: .leading, spacing: 20) {
                Text("SwiftUI")
                Text("rocks")
            }
            HStack {
                Text("SwiftUI")
                Text("rocks")
            }
        }
    }
パディングを使用して個々のビューの周囲の間隔を制御する方法
How to control spacing around individual views using padding
var body: some View {
        VStack {
            Text("SwiftUI")
                //.padding()
                //.padding(.bottom)
                //.padding(100)
                .padding(.bottom, 100)
            Text("rocks")
        }
    }
Zインデックスを使用してビューの階層化の順序を変更する方法
How to change the order of view layering using Z index
ZStack {
            Rectangle()
                .fill(Color.green)
                .frame(width: 50, height: 50)
                .zIndex(1)

            Rectangle()
                .fill(Color.red)
                .frame(width: 100, height: 100)
        }
さまざまなビュータイプを返す方法
How to return different view types
/*
    var body: some View {
        Group {
            if Bool.random() {
                Image("imageimage")
            } else {
                Text("Better luck next time")
            }
        }
    }
 */

    var body: some View {
        if Bool.random() {
            return AnyView(Image("imageimage"))
        } else {
            return AnyView(Text("Better luck next time"))
        }
サイズクラスを使用してさまざまなレイアウトを作成する方法
How to create different layouts using size classes
struct ContentView: View {
    @Environment(\.horizontalSizeClass) var horizontalSizeClass: UserInterfaceSizeClass?

    var body: some View {
        if horizontalSizeClass == .compact {
            return Text("Compact")
        } else {
            return Text("Regular")
        }
    }
}
サイズクラスに基づいてHStackとVStackを自動的に切り替える方法
How to automatically switch between HStack and VStack based on size class
サイズクラスを監視して、配置方法を決定できます。たとえばHStack、スペースが十分にあるVStack場合からスペースが制限されている場合に切り替えることができます。
少し考えれば、AdaptiveStack水平レイアウトと垂直レイアウトを自動的に切り替える新しいビューを作成できます。これにより、iPadでの優れたレイアウトの作成が簡単になります。これは、レイアウトが分割ビューとスリップオーバーのシナリオに自動的に調整されるためです。
import SwiftUI

struct AdaptiveStack<Content: View>: View {
    @Environment(\.horizontalSizeClass) var sizeClass
    let horizontalAlignment: HorizontalAlignment
    let verticalAlignment: VerticalAlignment
    let spacing: CGFloat?
    let content: () -> Content

    init(horizontalAlignment: HorizontalAlignment = .center, verticalAlignment: VerticalAlignment = .center, spacing: CGFloat? = nil, @ViewBuilder content: @escaping () -> Content) {
        self.horizontalAlignment = horizontalAlignment
        self.verticalAlignment = verticalAlignment
        self.spacing = spacing
        self.content = content
    }

    var body: some View {
        Group {
            if sizeClass == .compact {
                VStack(alignment: horizontalAlignment, spacing: spacing, content: content)
            } else {
                HStack(alignment: verticalAlignment, spacing: spacing, content: content)
            }
        }
    }
}


struct ContentView: View {
    var body: some View {
        AdaptiveStack {
            Text("Horizontal when there's lots of space")
            Text("but")
            Text("Vertical when space is restricted")
        }
    }
}
ビューにカスタムフレームを与える方法
How to give a view a custom frame
GeometryReaderを使用して相対サイズを提供する方法
How to provide relative sizes using GeometryReader
通常、SwiftUIにスタックを使用して自動レイアウトを実行させるのが最善ですが、を使用してコンテナーに対するビューのサイズを指定することもできますGeometryReader。たとえば、2つのビューで画面の使用可能な幅の半分を占めるようにする場合、画面の幅が事前にわからないため、ハードコードされた値を使用することはできません。
これを解決するために、GeometryReader使用可能な幅と高さを示す入力値を提供し、それを必要な計算で使用できます。したがって、2つのビューが同じ幅を占めるようにするには、次のように、使用可能なスペースを半分に分割できます。
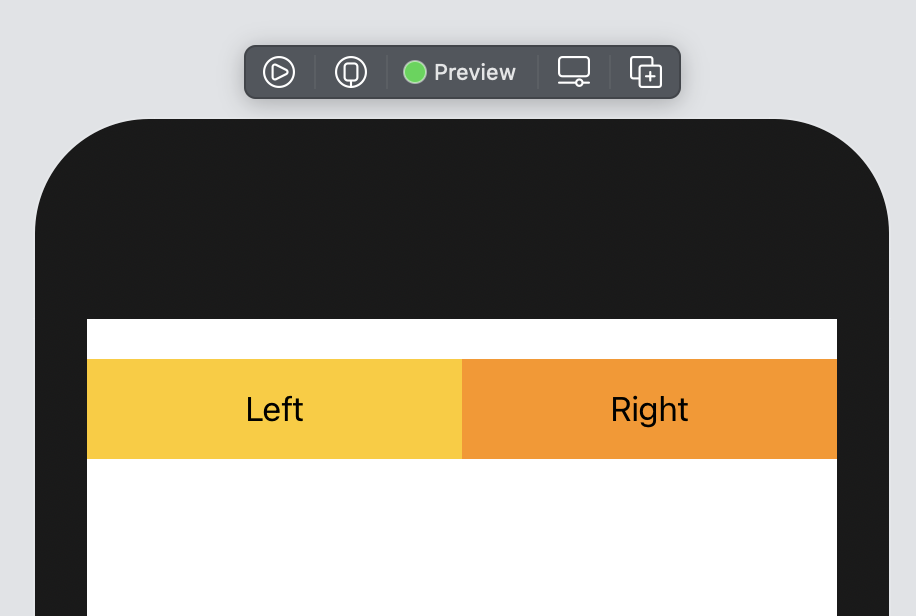
struct ContentView: View {
    var body: some View {
        GeometryReader { geometry in
            HStack(spacing: 0) {
                Text("Left")
                    .frame(width: geometry.size.width / 2, height: 50)
                    .background(Color.yellow)
                Text("Right")
                    .frame(width: geometry.size.width / 2, height: 50)
                    .background(Color.orange)
            }
        }
    }
}
安全なエリアの外にコンテンツを配置する方法
How to place content outside the safe area
var body: some View {
        Text("Hello World")
            .frame(minWidth: 0, maxWidth: .infinity, minHeight: 0, maxHeight: .infinity)
            .background(Color.red)
            .edgesIgnoringSafeArea(.all)
    }
var body: some View {
        Text("Hello World")
            .frame(minWidth: 0, maxWidth: .infinity, minHeight: 0, maxHeight: .infinity)
            .background(Color.red)
            .edgesIgnoringSafeArea(.all)
    }
ScrollViewを使用して水平および垂直スクロールを追加する方法
How to add horizontal and vertical scrolling using ScrollView
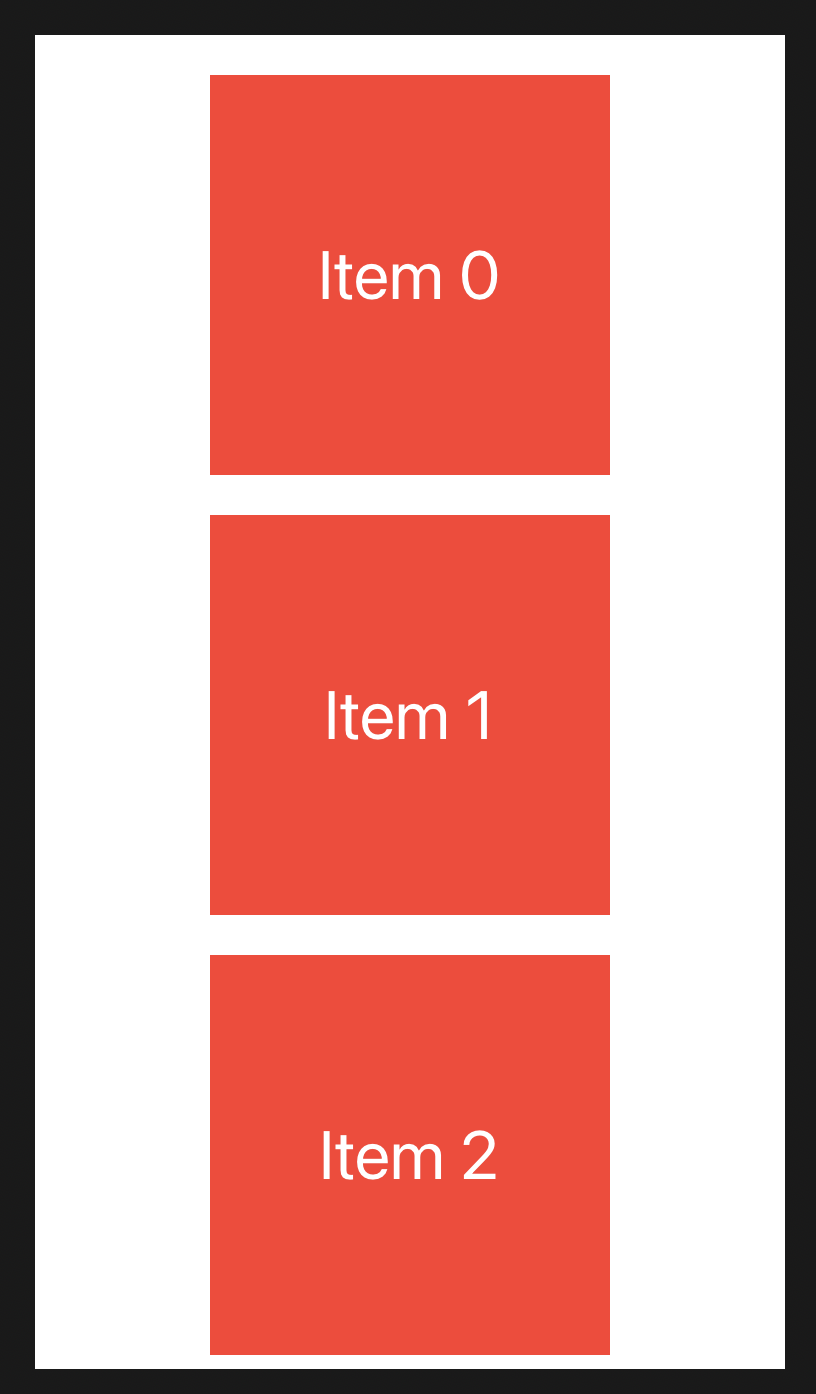
ScrollView {
            VStack(spacing: 20) {
                ForEach(0..<10) {
                    Text("Item \($0)")
                        .foregroundColor(.white)
                        .font(.largeTitle)
                        .frame(width: 200, height: 200)
                        .background(Color.red)
                }
            }
        }
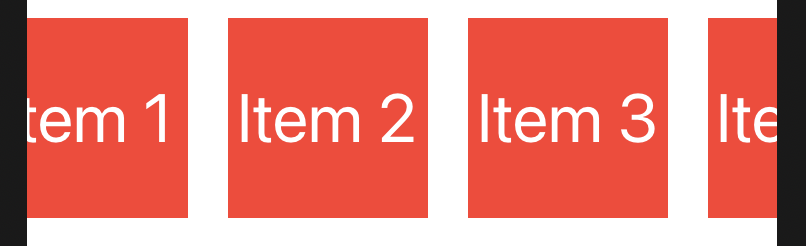
ScrollView(.horizontal) {
    HStack(spacing: 20) {
        ForEach(0..<10) {
            Text("Item \($0)")
                .foregroundColor(.white)
                .font(.largeTitle)
                .frame(wi

dth: 200, height: 200)
                .background(Color.red)
        }
    }
}
次のように、スクロールアクションが発生したときにスクロールインジケーターを表示するかどうかを決定できます。
ScrollView(.horizontal, showsIndicators: false) {
ScrollViewとGeometryReaderを使用してCoverFlowのような3D効果を作成する方法
How to create 3D effects like Cover Flow using ScrollView and GeometryReader
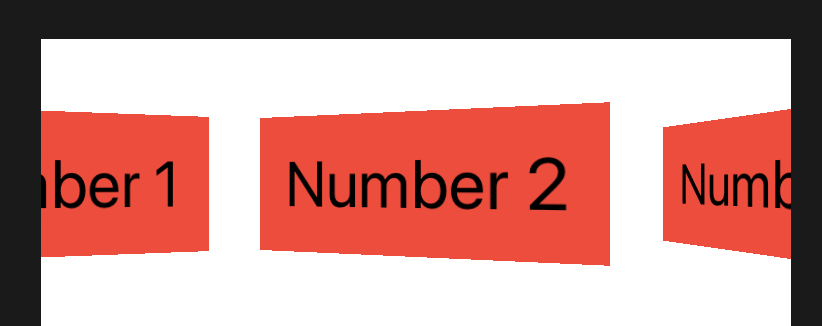
struct ContentView: View {
    var body: some View {
        ScrollView(.horizontal, showsIndicators: false) {
            HStack(spacing: 0) {
                ForEach(1..<10) { num in
                    VStack {
                        GeometryReader { geo in
                            Text("Number \(num)")
                                .font(.largeTitle)
                            .padding()
                            .background(Color.red)
                            .rotation3DEffect(.degrees(-Double(geo.frame(in: .global).minX) / 8), axis: (x: 0, y: 1, z: 0))
                        }
                    }
                    .frame(width: 180)
                }
            }
            .padding()
        }
    }
}

struct ContentView: View {
    @State var dragAmount = CGSize.zero

    var body: some View {
        VStack {
            GeometryReader { geo in
                Rectangle()
                    .fill(LinearGradient(gradient: Gradient(colors: [.yellow, .red]), startPoint: .topLeading, endPoint: .bottomTrailing))
                    .frame(width: 300, height: 200)
                    .clipShape(RoundedRectangle(cornerRadius: 20))
                    .rotation3DEffect(.degrees(-Double(self.dragAmount.width) / 20), axis: (x: 0, y: 1, z: 0))
                    .rotation3DEffect(.degrees(Double(self.dragAmount.height / 20)), axis: (x: 1, y: 0, z: 0))
                    .offset(self.dragAmount)
                    .gesture(
                        DragGesture()
                            .onChanged { self.dragAmount = $0.translation }
                            .onEnded { _ in
                                withAnimation(.spring()) {
                                    self.dragAmount = .zero
                                }
                            }
                    )
            }
        }
    }
}
How to rotate a view in 3D
ビューを3Dで回転させる方法How to rotate a view in 3D

Text("EPISODE LLVM")
    .font(.largeTitle)
    .foregroundColor(.yellow)
    .rotation3DEffect(.degrees(45), axis: (x: 1, y: 0, z: 0))
100 Days of SwiftUI(DAY 93(Project18 part 2))
LazyVGridとLazyHGridを使用してグリッドにビューを配置する方法
How to position views in a grid using LazyVGrid and LazyHGrid
iOS14の新機能 LazyVGridとLazyHGrid
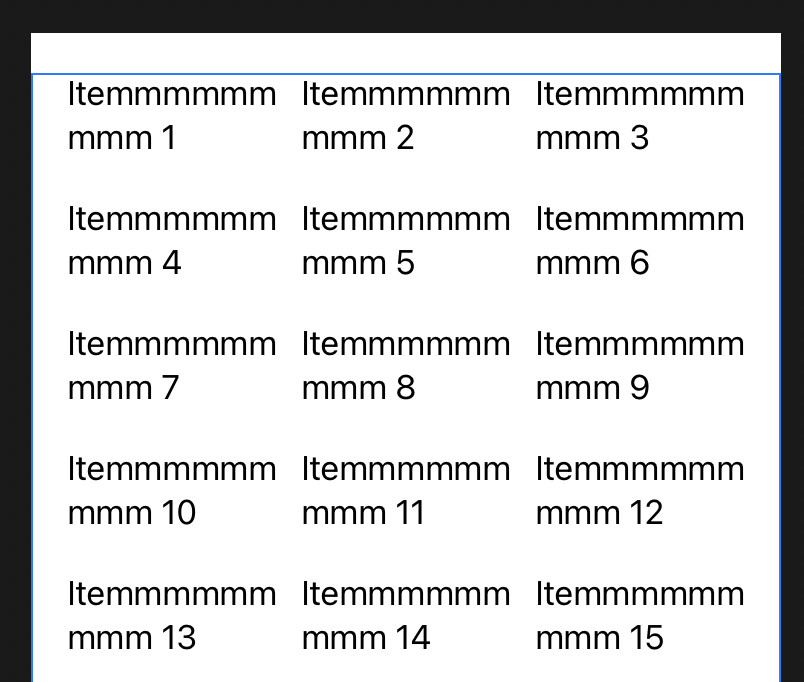
サイズが80ポイントのセルを使用して垂直グリッドレイアウトが作成されます。
GridItem(.adaptive(minimum: 80))とは、それぞれ80ポイントの最小サイズを使用して、グリッドを行ごとにできるだけ多くのアイテムに収めることを意味します。
struct ContentView: View {
    let data = (1...1000).map { "Itemmmmmmmmm \($0)" }

    let columns = [
        //以下により、列数変更 Y軸に収まる列数
        GridItem(.adaptive(minimum: 80))
    ]

    var body: some View {
        ScrollView {
            // 行間隔
            LazyVGrid(columns: columns, spacing: 20) {
                ForEach(data, id: \.self) { item in
                    Text(item)
                }
            }
            .padding(.horizontal)
        }
    }
}
列数を制御、固定サイズ、ScrollView

struct ContentView: View {
//    let data = (1...1000).map { "Item \($0)" }
    let items = 1...20

//    //  列数 自動
//    let columns = [
//        //以下により、列数変更 Y軸に収まる列数
//        GridItem(.adaptive(minimum: 80))
//    ]
//    //列の数を制御 3行
//    let columns = [
//        GridItem(.flexible()),
//        GridItem(.flexible()),
//        GridItem(.flexible())
//    ]
//    //固定サイズ
//    let columns = [
//        GridItem(.fixed(100)),
//        GridItem(.flexible()),
//    ]
    let rows = [
            GridItem(.fixed(50)),
            GridItem(.fixed(50))
        ]

    var body: some View {
            ScrollView(.horizontal) {
                LazyHGrid(rows: rows, alignment: .center) {
                    ForEach(items, id: \.self) { item in
                        //Image("Heading\(item)")
                        Image("dokuro")
                    }
                }
            }
        }
}
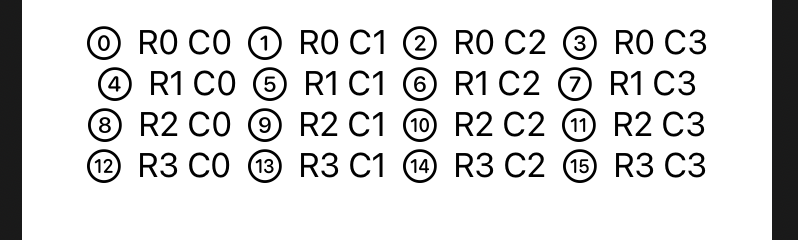
iOS 13対応版
struct GridStack<Content: View>: View {
    let rows: Int
    let columns: Int
    let content: (Int, Int) -> Content

    var body: some View {
        VStack {
            ForEach(0 ..< rows, id: \.self) { row in
                HStack {
                    ForEach(0 ..< self.columns, id: \.self) { column in
                        self.content(row, column)
                    }
                }
            }
        }
    }

    init(rows: Int, columns: Int, @ViewBuilder content: @escaping (Int, Int) -> Content) {
        self.rows = rows
        self.columns = columns
        self.content = content
    }
}

struct ContentView: View {
    var body: some View {
        GridStack(rows: 4, columns: 4) { row, col in
            Image(systemName: "\(row * 4 + col).circle")
            Text("R\(row) C\(col)")
        }
        }
}
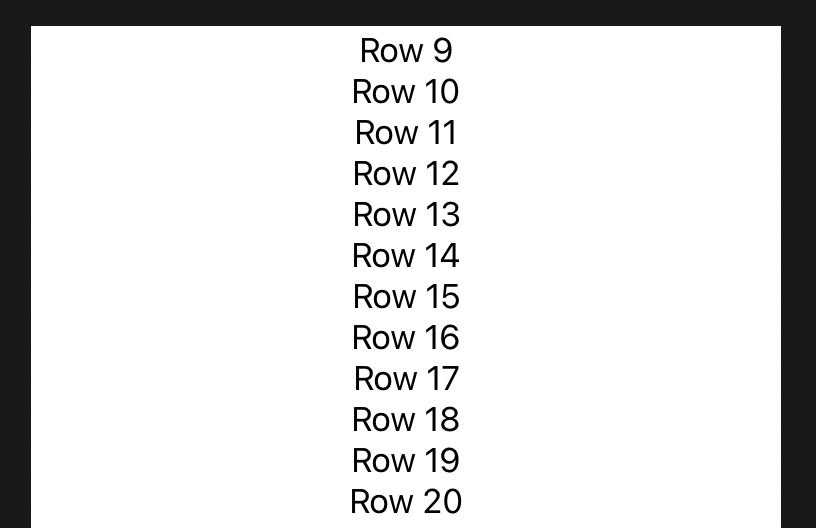
LazyVStackとLazyHStackを使用してビューを遅延ロードする方法
How to lazy load views using LazyVStack and LazyHStack
struct ContentView: View {
    var body: some View {
        ScrollView {
            LazyVStack {
                ForEach(1...1000, id: \.self) { value in
                    Text("Row \(value)")
                }
            }
        }
    }
}
レイジースタックは自動的に柔軟な優先幅を持つため、通常のスタックとは異なり、空き領域を占有します。違いを確認するには、上記のコードを試してみてください。テキストの周りの空白を使用してドラッグできますが、通常に切り替えるとVStack、テキスト自体を使用してスクロールする必要があることがわかります。
struct SampleRow: View {
    let id: Int

    var body: some View {
        Text("Row \(id)")
    }

    init(id: Int) {
        print("Loading row \(id)")
        self.id = id
    }
}

struct ContentView: View {
    var body: some View {
        ScrollView {
            LazyVStack {
            //VStack {
                ForEach(1...1000, id: \.self, content: SampleRow.init)
            }
        }
    }
}
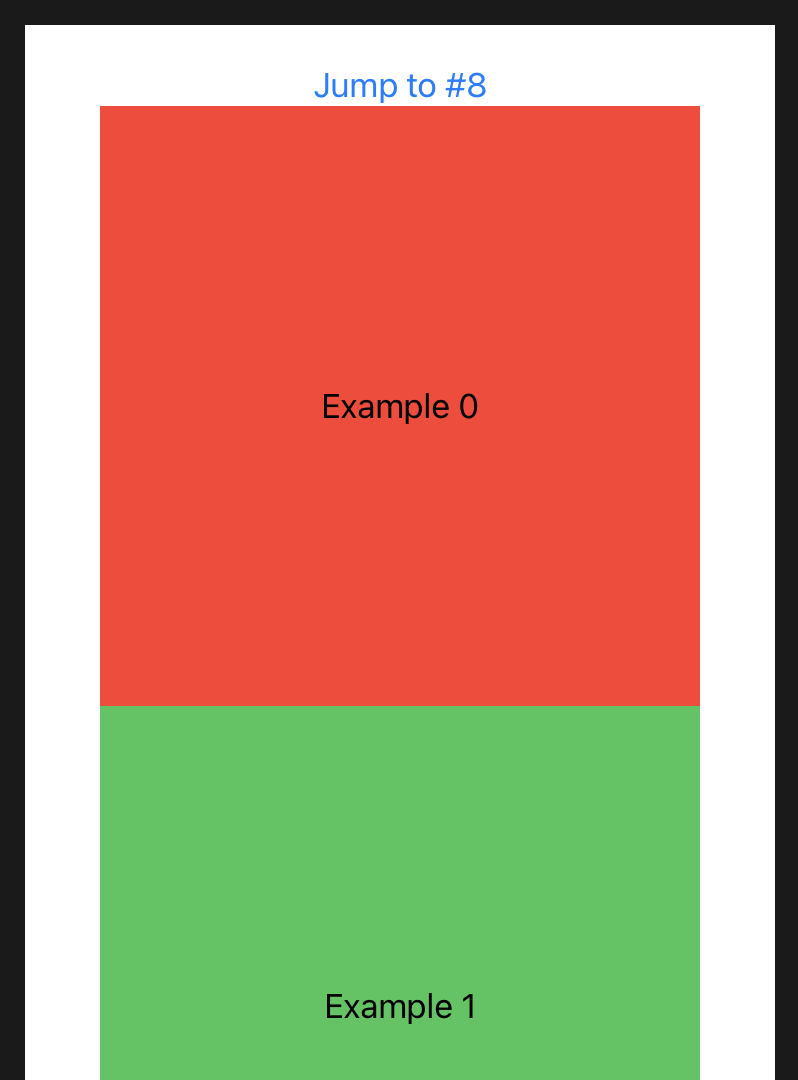
ScrollViewReaderを使用してスクロールビューを特定の場所に移動する方法
How to make a scroll view move to a location using ScrollViewReader
iOS14の新機能
プログラムでSwiftUIをScrollView特定の場所に移動させたい場合は、そのScrollViewReader中に埋め込む必要があります。これにより、scrollTo()アンカーを指定するだけで、親スクロールビュー内の任意のビューに移動できるメソッドが提供されます。
たとえば、これにより、垂直スクロールビューに10色のボックスが作成され、ボタンを押すと、ID8のボックスに直接スクロールします。
struct ContentView: View {
    let colors: [Color] = [.red, .green, .blue]

    var body: some View {
        ScrollView {
            ScrollViewReader { value in
                Button("Jump to #8") {
                    //value.scrollTo(8)
                    value.scrollTo(8, anchor: .top)
                }

                ForEach(0..<10) { i in
                    Text("Example \(i)")
                        .frame(width: 300, height: 300)
                        .background(colors[i % colors.count])
                        .id(i)
                }
            }
        }
    }
}