ナビゲーションビューにビューを埋め込む方法
How to embed a view in a navigation view
//-----------------------------------
struct ContentView: View {
    var body: some View {
        NavigationView {
            Text("SwiftUI")
                //.navigationBarTitle("Welcome")
                .navigationBarTitle("Welcome", displayMode: .inline)
        }
    }
}
//-----------------------------------
How to add bar items to a navigation view
//-----------------------------------
struct ContentView: View {
    var body: some View {
        NavigationView {
            Text("SwiftUI")
                .navigationBarTitle("Welcome")
                .navigationBarItems(trailing:
                    HStack {
                        Button("About") {
                            print("About tapped!")
                        }

                        Button("Help") {
                            print("Help tapped!")
                        }
                    }
                )
        }
    }
}
//-----------------------------------
TabViewを使用してタブバーにビューを埋め込む方法
How to embed views in a tab bar using TabView
TabView
基本的な形式では、各アイテムに画像とタイトルを指定する必要があります。
タグを追加すると、タブビューの選択を変更することで、アクティブなタブをプログラムで制御できます。まず、アクティブなタブを追跡できる状態を追加します。
//-----------------------------------
struct ContentView: View {
    @State var selectedView = 0

    var body: some View {
        TabView(selection: $selectedView) {
        //TabView {
            Text("First View")
                .tabItem {
                    Image(systemName: "1.circle")
                    Text("First")
                }.tag(0)
            Text("Second View")
                .tabItem {
                    Image(systemName: "2.circle")
                    Text("Second")
                }.tag(1)
        }
    }
}
//-----------------------------------
tabViewStyle()を使用してコンテンツのスクロールページを作成する方法
How to create scrolling pages of content using tabViewStyle()
TabViewは、と同等の機能を兼ねており、UIPageViewControllerコンテンツの複数の画面をスワイプして、下部にページングドットを表示し、ユーザーの現在地を表示できます。
ページビュースタイルをアクティブにするには、に.tabViewStyle()修飾子を付けてTabView、を渡しますPageTabViewStyle()。
たとえば、これを@mainSwiftファイルに追加できます。
@main
struct SwiftUI_by_Example_1App: App {
    var body: some Scene {
//        WindowGroup {
//            ContentView()
//        }
        WindowGroup {
                    TabView {
                        ContentView()
                        HomeView()
                        AccountView()
                        ProfileView()
                        SettingsView()

                    }
                    .tabViewStyle(PageTabViewStyle())
                    .indexViewStyle(PageIndexViewStyle(backgroundDisplayMode: .always))
        }
    }
}

struct SwiftUI_by_Example_1App_Previews: PreviewProvider {
    static var previews: some View {
        /*@START_MENU_TOKEN@*/Text("Hello, World!")/*@END_MENU_TOKEN@*/
    }
}
//-----------------------------------
struct HomeView: View {
    var body: some View {
        Text("Hello, World")
            .foregroundColor(Color.white)
                    .frame(maxWidth: .infinity, maxHeight: .infinity)
                    .background(Color.black)
    }
}
struct AccountView: View {
    var body: some View {
        Text("AccountView")
    }
}
struct ProfileView: View {
    var body: some View {
        Text("ProfileView")
    }
}
struct SettingsView: View {
    var body: some View {
        Text("SettingsView")
    }
}
//-----------------------------------
struct ContentView: View {
    var body: some View {
        List {
            ForEach(0..<10) {
                Text("Row \($0)")
            }
            //.listRowBackground(Color.red)
        }
    }
}
//-----------------------------------
struct ContentView_Previews: PreviewProvider {
    static var previews: some View {
        ContentView()
    }
}
How to group views together
now we can go beyond the 10 view limit because the VStack contains only two views – two groups.
var body: some View {
    VStack {
        Group {
            Text("Line")
            Text("Line")
            Text("Line")
            Text("Line")
            Text("Line")
            Text("Line")
        }

        Group {
            Text("Line")
            Text("Line")
            Text("Line")
            Text("Line")
            Text("Line")
        }
    }
}
ステータスバーを表示および非表示にする方法
How to hide and show the status bar
struct ContentView: View {
    @State var hideStatusBar = false

    var body: some View {
        Button("Toggle Status Bar") {
            withAnimation {
                self.hideStatusBar.toggle()
            }
        }
        .statusBar(hidden: hideStatusBar)
    }
}
アプリの起動時に表示されるビューを制御する方法
How to control which view is shown when your app launches
アプリのブートストラップに使用され、最初のユーザーインターフェイスを表示します。これにより、古いAppDelegate.swiftファイルとSceneDelegate.swiftファイルが置き換えられます。
@main
struct SwiftUITestApp: App {
    var body: some Scene {
        WindowGroup {
            ContentView()
        }
    }
}
WindowGroup {
    TabView {
        HomeView()
        ContactsView()
        LocationView()
        AccountView()
    }
}
DisclosureGroupを使用してコンテンツを非表示および表示する方法
How to hide and reveal content using DisclosureGroup
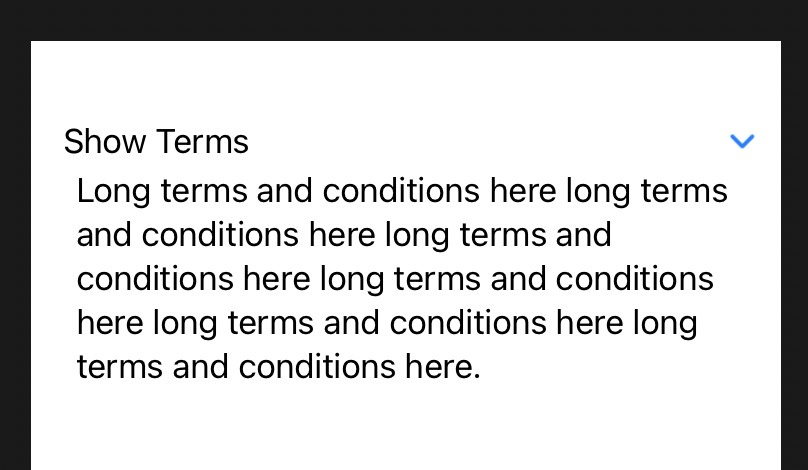
DisclosureGroup内部の開示インジケーターとコンテンツを表示する専用のビューがあります。これは、コンテンツが現在表示されているかどうかを決定するある種のブールプロパティにバインドできますが、展開時に表示するためにそこに多くのビューを配置できます。
struct ContentView: View {
    @State private var revealDetails = false

    var body: some View {
        VStack {
            DisclosureGroup("Show Terms", isExpanded: $revealDetails) {
                Text("Long terms and conditions here long terms and conditions here long terms and conditions here long terms and conditions here long terms and conditions here long terms and conditions here.")
            }
            .padding()

            Spacer()
        }
    }
}
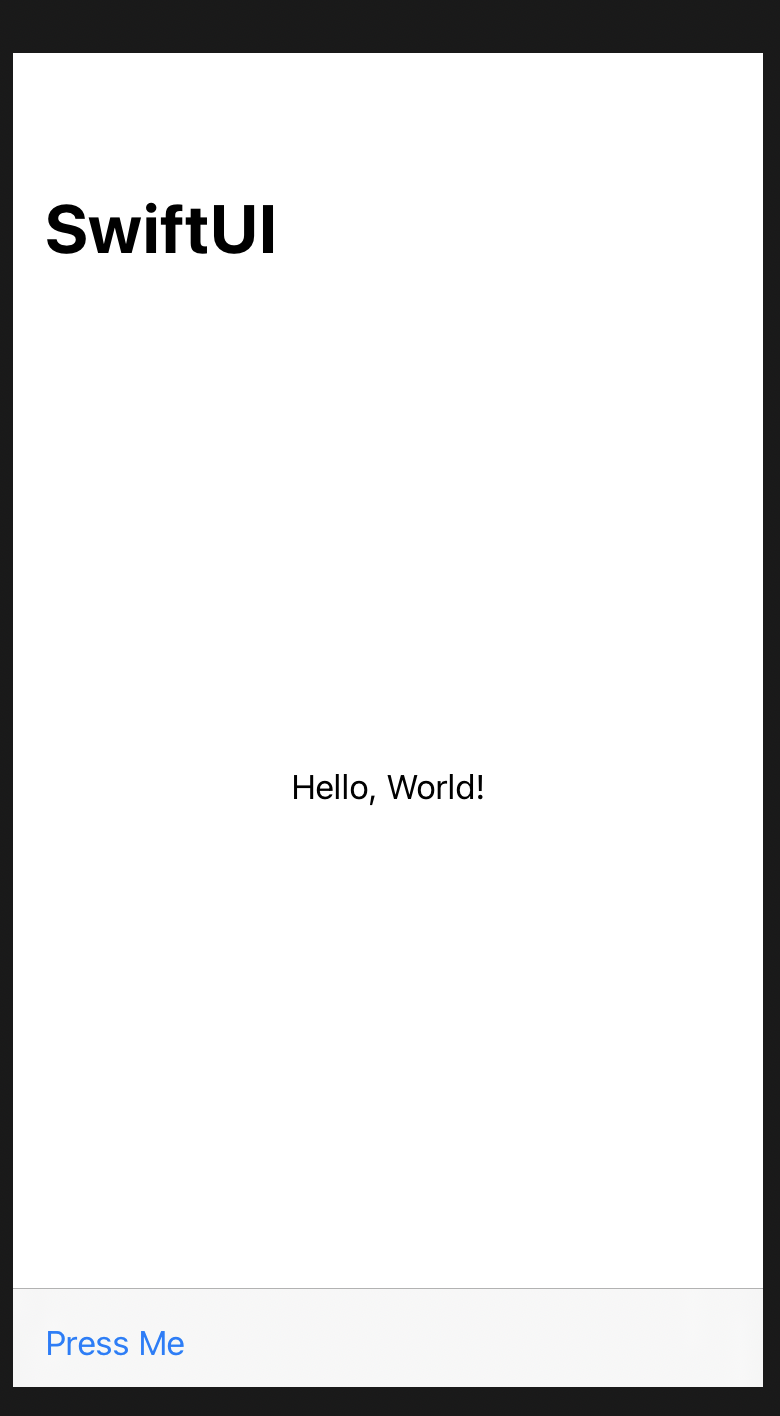
How to create a toolbar and add buttons to it
struct ContentView: View {

    @State private var revealDetails = false

    var body: some View {
        NavigationView {
    Text("Hello, World!").padding()
        .navigationTitle("SwiftUI")
        .toolbar {
            ToolbarItem(placement: .bottomBar) {
                Button("Press Me") {
                    print("Pressed")
                }
            }
        }
}
    }
}
AppDelegateをSwiftUIアプリに追加する方法
How to add an AppDelegate to a SwiftUI app
SwiftUIアプリは、Appプロトコルに準拠するカスタム構造体を使用して起動しますがUIApplicationDelegate、プッシュ通知の登録の処理、メモリ警告への応答、時間の変更の検出など、以前の機能を取り戻したい場合があります。オン。
これを行うには、最初に、次のようNSObjectに、UIApplicationDelegateプロトコルを継承してプロトコルに準拠するカスタムクラスを作成します。
didFinishLaunchingWithOptionsそこに追加しましたが、必要なのは気になるメソッドを実装することだけです。
そして今、あなたのAppシーンで、UIApplicationDelegateAdaptorプロパティラッパーを使用してAppDelegate、アプリケーションデリゲートにクラスを使用する必要があることをSwiftUIに伝えます。
class AppDelegate: NSObject, UIApplicationDelegate {
    func application(_ application: UIApplication, didFinishLaunchingWithOptions launchOptions: [UIApplication.LaunchOptionsKey : Any]? = nil) -> Bool {
        print("Your code here")
        return true
    }
}

@main
struct SwiftUITestApp: App {
    @UIApplicationDelegateAdaptor(AppDelegate.self) var appDelegate

    var body: some Scene {
        WindowGroup {
            ContentView()
        }
    }
}

struct SwiftUI_by_Example_1App_Previews: PreviewProvider {
    static var previews: some View {
        /*@START_MENU_TOKEN@*/Text("Hello, World!")/*@END_MENU_TOKEN@*/
    }
}